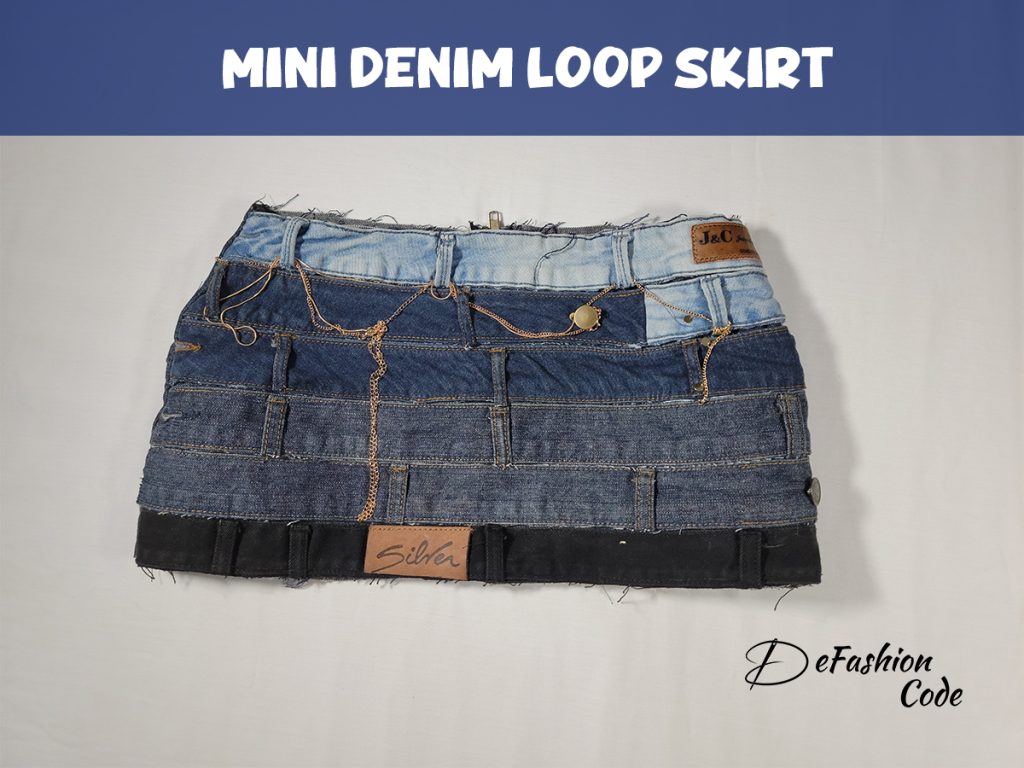
Calling all DIY Sewers!
In this tutorial, we’re going to transform those denim waistbands with loops into a head-turning mini skirt that’s both fashionable and fiercely original. Whether you’re a seasoned stitcher or a curious beginner, this project is your ticket to joining the loop skirt trend.
Here is a short clip of how I created this skirt, you can watch it before we get this step by step tutorial started:
Materials & Supplies Used:
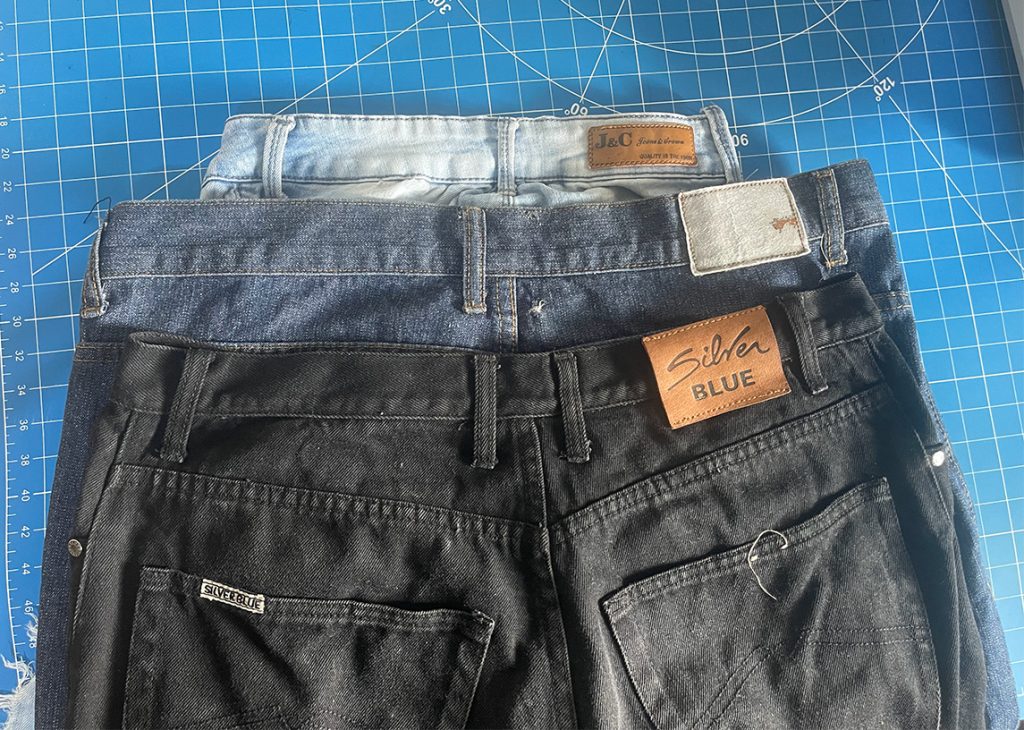
- 4 Denim Pants with Belt Loops
- Sewing Machine
- Scissors
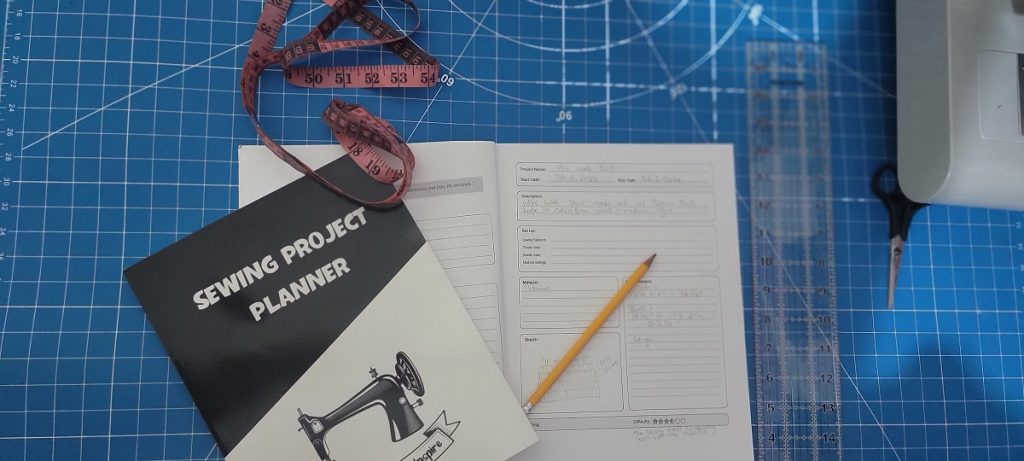
- Measuring Tape, Rulers
- Needle & Thread (Optional)
- Tailors Chalk
- Accessory (Optional)
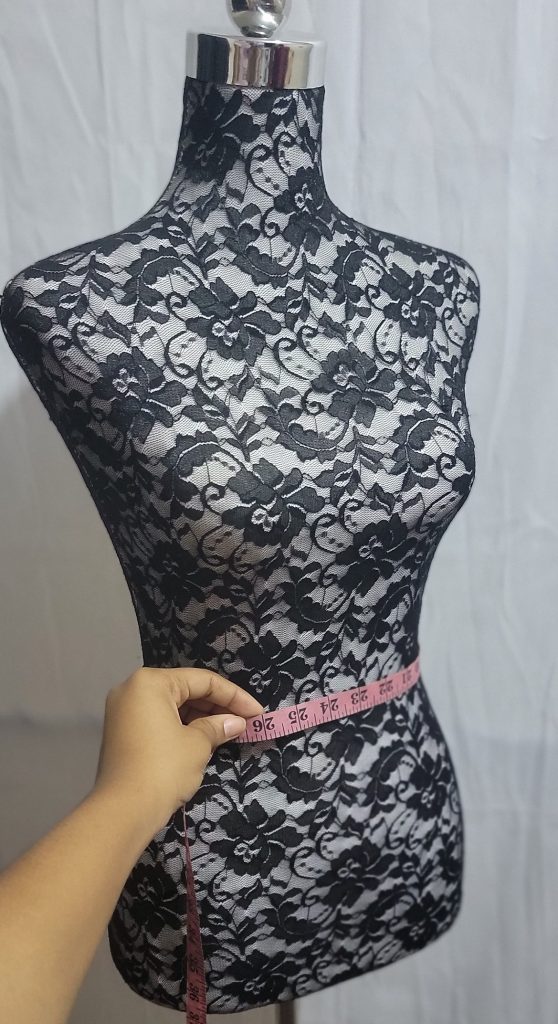
Step 1: Take Measurements For Your Skirt
*If you already have a skirt pattern block you can go ahead and skip out the measurement section.*
The measurements that you will need are:
- Waist circumference
- Hip circumference (Measure around the fullest part of the hips)
- Skirt length
Factors to consider when choosing your length:
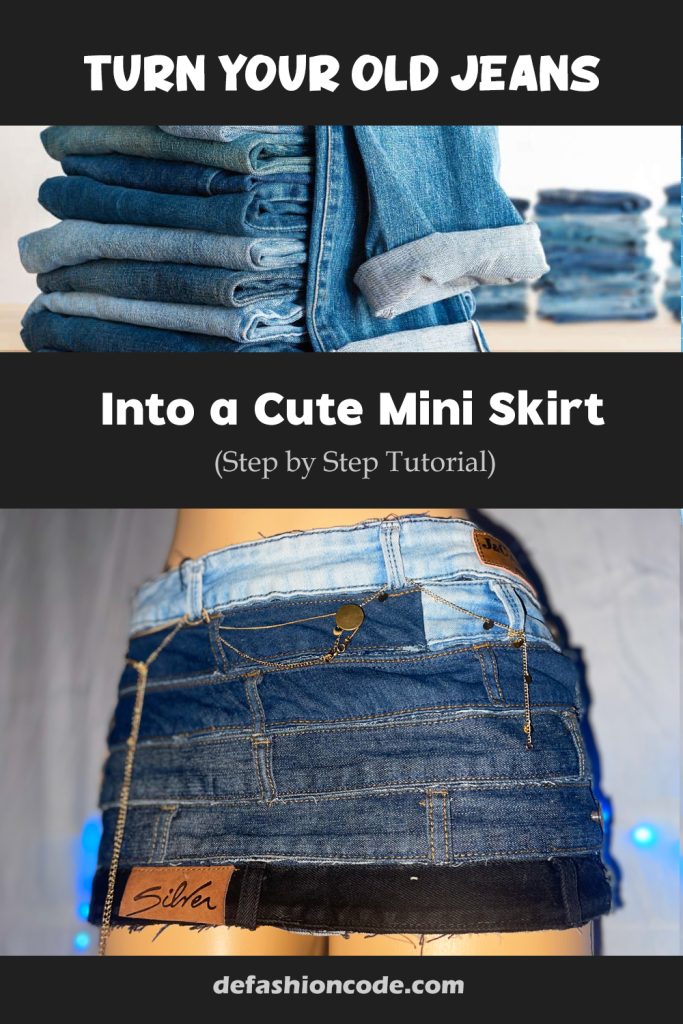
- I recycled the jeans, so I used the pant legs to create both the front and back of the skirt. This meant I had to decide how tall the skirt would be based on the width of the pant legs.
- Consider the number of waistbands you’ll use, as this significantly impacts the final length of the skirt. For example, I initially had a length of 14 inches and planned for 3 waistbands. However, I discovered extra space in the skirt base, So I had to add an additional waistband to complete the front of the skirt.
Step 2: Calculate Measurements for Front & Back
Front Piece:
- Waist Circumference divide by 4+1/2″ seam allowance
- Hip Circumference divide by 4+ 1″ ease+1/2″ seam allowance
Back Piece:
- Waist Circumference divide by 4+5/8″ Zipper allowance+1/2″ seam allowance
- Hip Circumference divide by 4+ 5/8″ Zipper allowance+ 1″ ease+1/2″ seam allowance
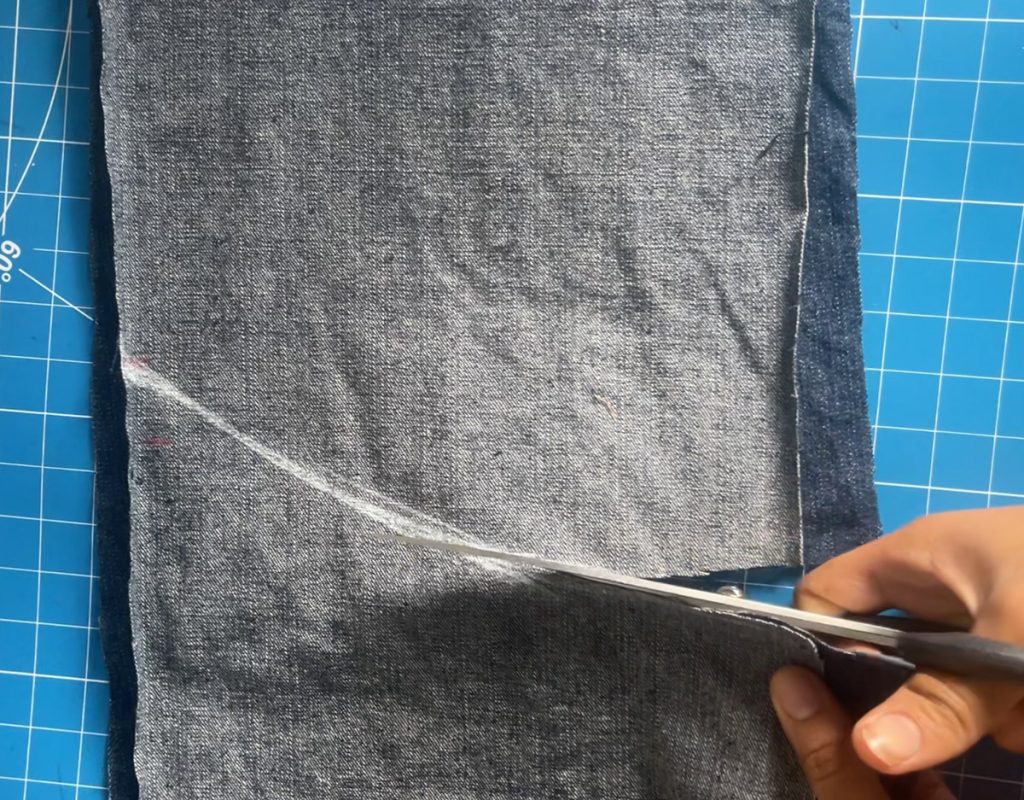
Step 3: Cut Out Your Waistbands
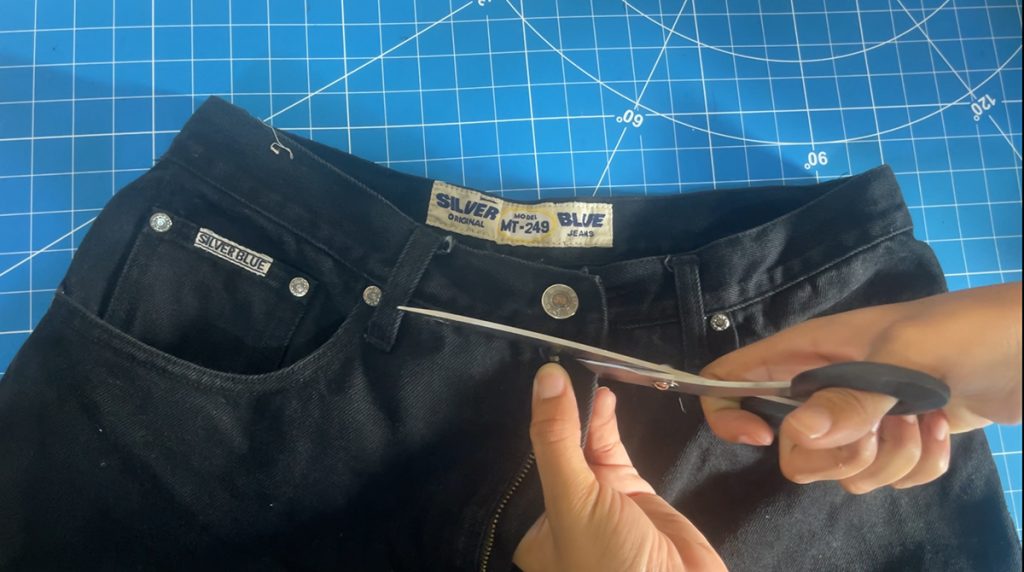
Cut out your waistbands, paying close attention to the edges and corners to ensure clean, precise cuts. After cutting, take a moment to inspect the waistbands for any excess fabric or uneven edges. Use scissors or a rotary cutter to trim away any excess fabric or uneven edges, aiming for smooth, clean lines.
Step 4: Draw pattern and Cut out your Denim
Now that you have your measurements, you can proceed to draw out the patterns on your fabric and then cut them out.
When cutting the fabric, the front piece of the skirt should be cut on the fold of the fabric. This means you’ll place the pattern along the fold line so that when you cut, you’ll end up with one continuous piece for the front of the skirt.
As for the back piece, it should be cut twice, meaning you’ll need to place the pattern on the fabric and cut it out twice separately. This ensures you have two separate pieces for the back of the skirt, which will be joined together later during assembly.
Step 5: Align & Pin Waistbands on Front
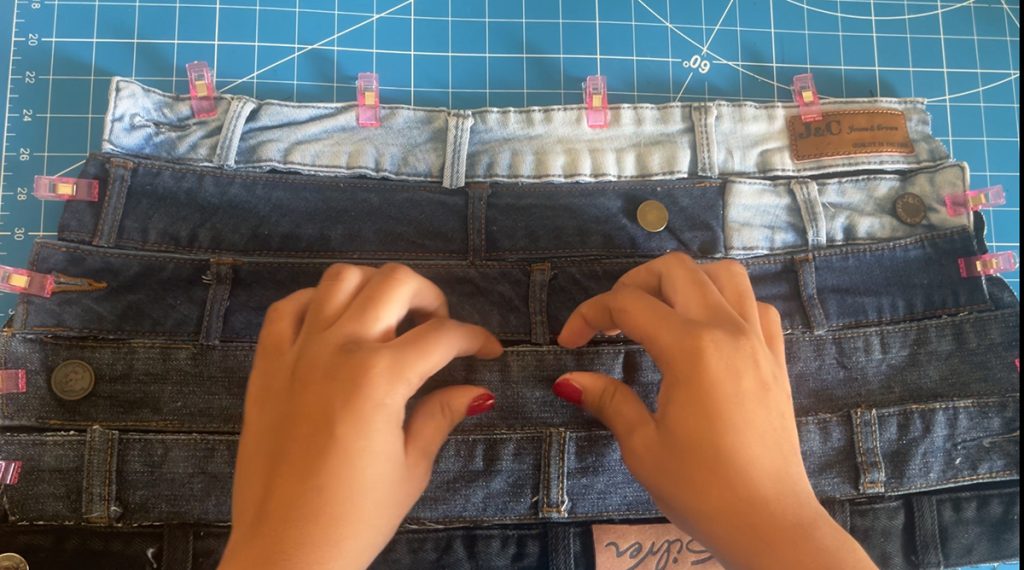
Consider the sequence in which you’ll arrange your waistbands.
Ensure the waistbands are long enough to cover the entire front base fabric, leaving out the seam allowance. This creates the illusion that only the waistbands are used for the front, with no other fabric underneath.
Secure everything in position with pins before proceeding to sew.
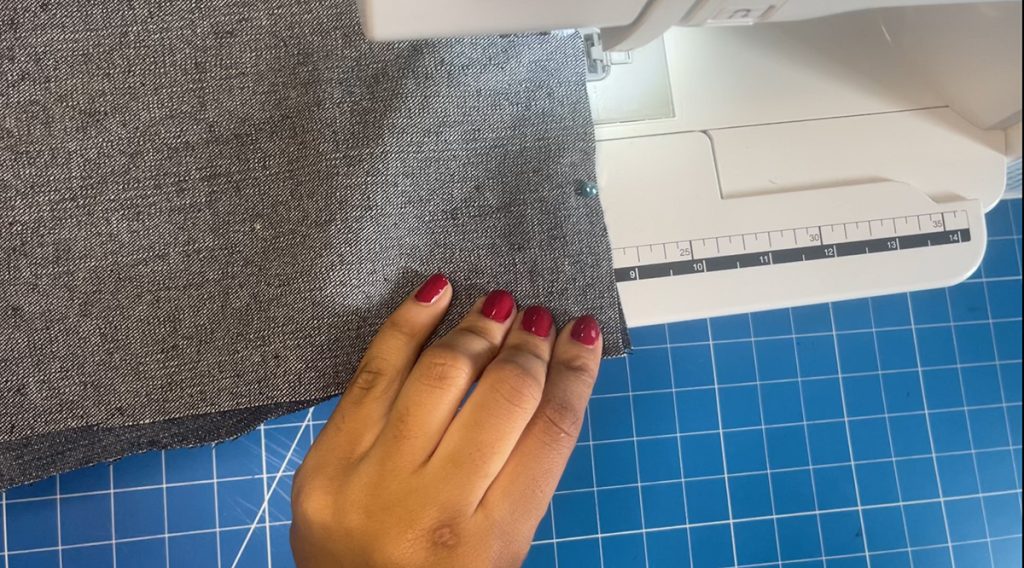
Step 6: Sew on the Waistbands
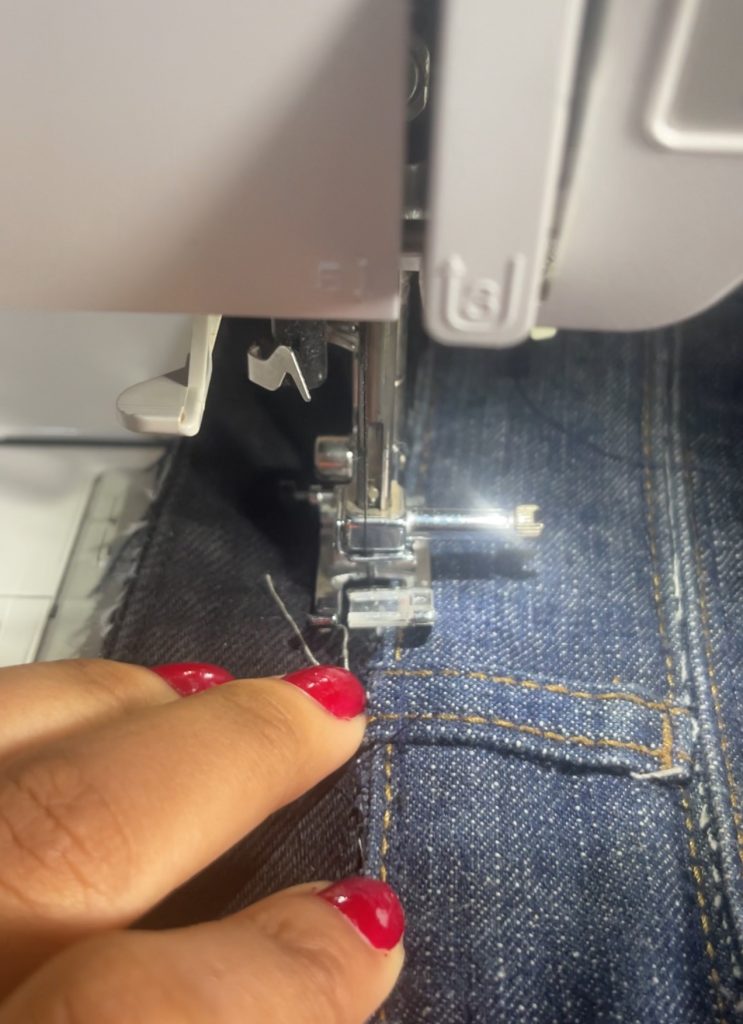
Sew over the thread lines that were originally stitched on the waistband, both at the top and bottom. Consider using needle sizes suitable for denim fabric (I used a 100/16).
Since I was using my domestic machine, I didn’t want to stress it too much when sewing over really thick areas. Therefore, I hand-sewed sections that were too bulky.
Step 7: Attach Zipper to Back Pieces
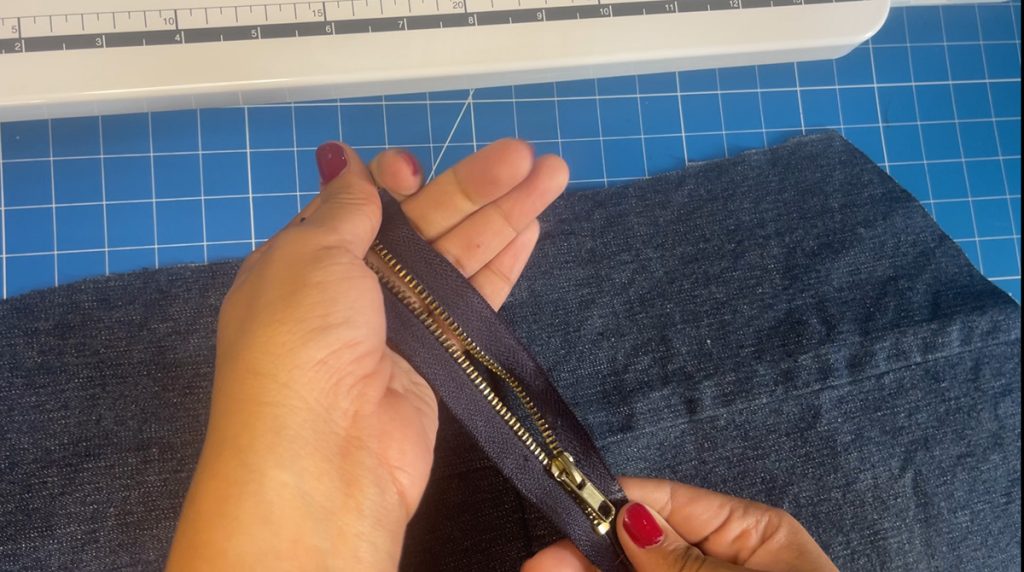
You’re now going to add your zipper to complete the back section of the skirt.
Here is how you attach the zipper:
- Lay the zipper face down against the right side of one back piece, aligning the zipper teeth with the fabric edge.
- Pin the zipper in place, then using a zipper foot on your sewing machine, stitch close to the teeth, being careful not to catch them with your needle.
- Repeat the process on the other side.
- Once both sides are attached, do a final check to make sure the zipper operates smoothly and lies flat against the skirt, making any adjustments if necessary.
This step is all about precision, as a well-inserted zipper will give your mini skirt a professional finish.
Step 8: Sew Both Sides Together
Place the front and back skirt pieces together, aligning the sides, and pin them in place. Using a sturdy thread that matches the color of your denim, sew along the pinned edges with a sewing machine set to a straight stitch.
Ensure to backstitch at the beginning and end of your sewing to secure the thread. While sewing, remove the pins to prevent them from causing your needle to break.
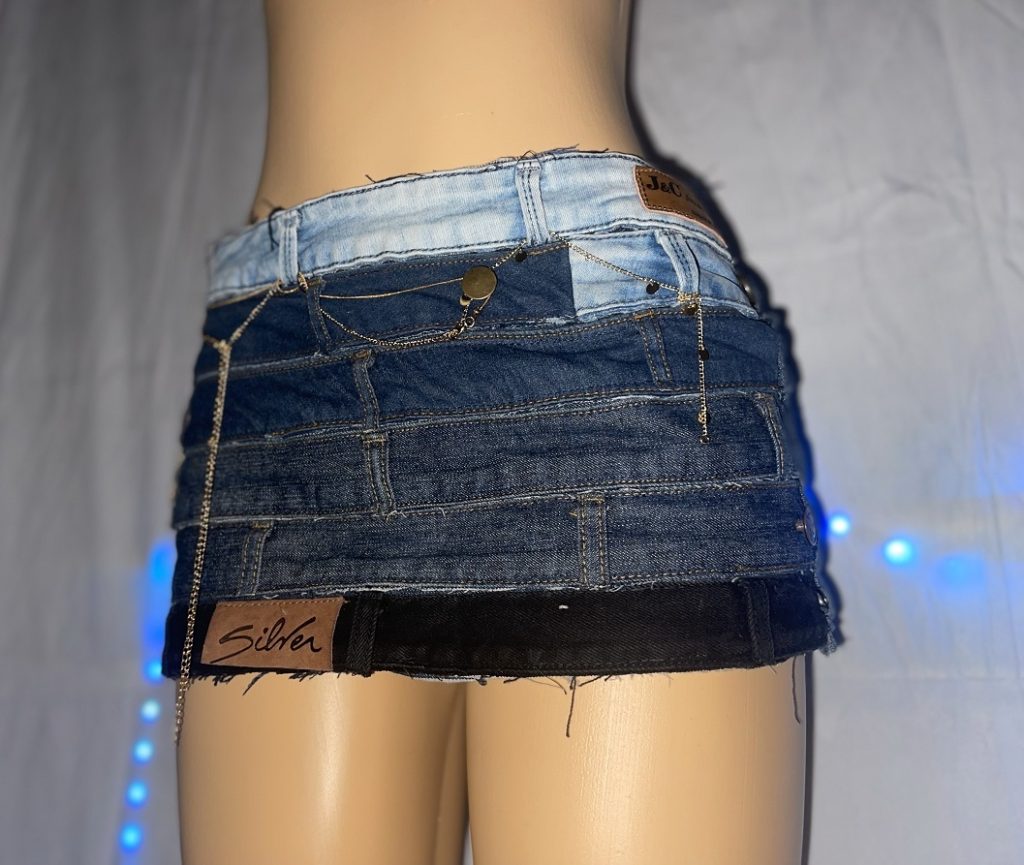
Once both sides are sewn, turn your skirt right-side out and admire the seamless join that gives shape to your new mini skirt!
Step 9 (Optional): Add Your Personal Touch!
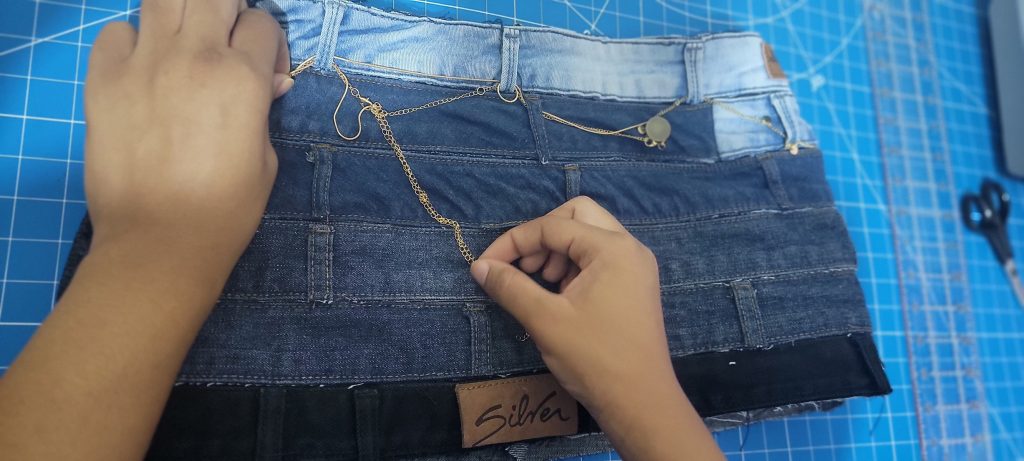
As shown, I’ve chosen to enhance the skirt’s appearance with a chain, offering inspiration for your own personal touch. Consider adding elements such as fringe, beads, patches, or anything else that resonates with you to make your mini skirt truly unique.
We’re All Done!
Congratulations, everyone! Your Mini Denim Loop Skirt is now complete! We hope you’ve enjoyed this tutorial. We’d love to see how your skirt turned out, so feel free to share your results in the comment section below!”